
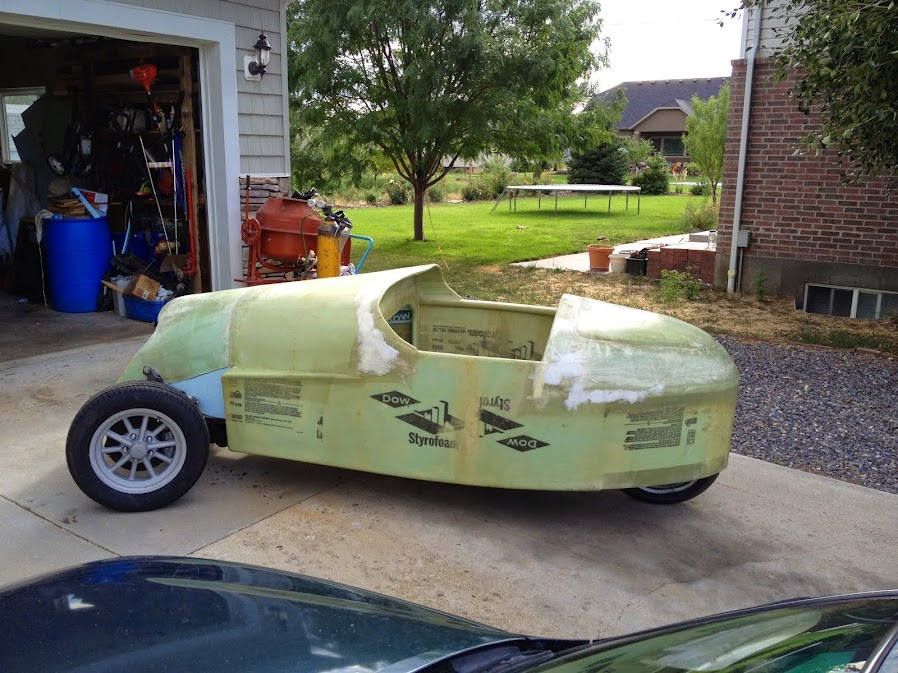
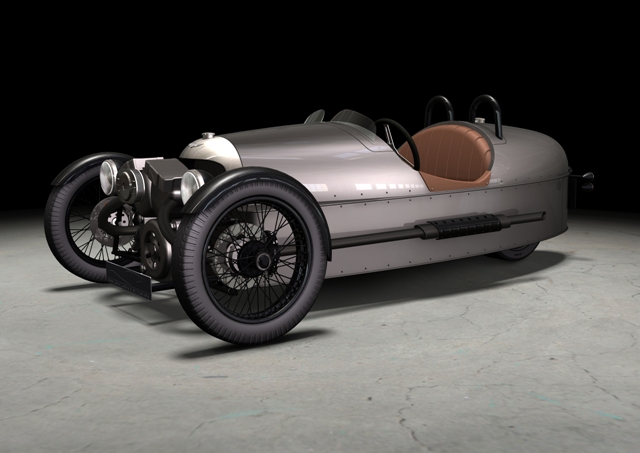
Crockett Motor Works: Watch the construction of the CMW Beetle Back Morgan reverse trike replica.
Wednesday, December 29, 2010
Rear Wheel and Swing Arm
Monday, November 29, 2010
Cabin Area and Wheel Well


View of the cabin area where the seats will mount to the floor.

 |
| This is the rear wheel well. I also did a layup at the top of the wheel well and a layup where it transitions to the floor. The foam showing will be an area where a cut out will be made for the rear swing arm coil over suspension. |
Monday, November 8, 2010
Hood layup:


Tuesday, November 2, 2010
Before and After of beetle back trunk area:
 |
| The next step will be to cut out the trunk opening and add hinges and a latch. |


Friday, October 22, 2010
Beetle Back layup done


The picture above shows the make shift support to hold the shape. It is not pretty but it worked good enough.
Sunday, October 10, 2010
Beetle back (trunk area)
 All supports used to hold the shape inside and screws have been removed. Now I just need a good 2 hours to do the fiberglass work. Then we will put the trunk back on and attach it to the body. Then we will cut the access panels to the different sections of the trunk. Fun Fun Fun!
 I built a make shift support around the rear trunk area and then removed it. This holds the shape while I prep it for the inside fiberglass work. Just so you know we do not work on the Sabbath.
Monday, October 4, 2010
Front End Work
 The right side. This will need a bit of grinding and also welding.
  This will require a little welding at the seam.
 Several brackets and unnecessary steel removed. with a little more cleaning up and some sandblasting this will look good as new.
 Left A-arm:
 One of the a-arm assemblies.
Here is the front end from a 1984 corvette. It is in pretty good shape for its age. Now for the dis-assembly.
Sunday, September 12, 2010

 This was very difficult. The boy's were not available to help. When doing this it goes so much better to have someone to assist you. It looks a bit hodgepodge but it will work great. I put at least 2 and up to 4 layers. This will add to how rigid it will be when I remove it to fiberglass the other side. It definitely is starting to look like a Morgan Beetle-back.

Monday, September 6, 2010
 We thought we would test out the fit. Very roomy. Can't wait to start working on the frame so we can role it out of the garage.
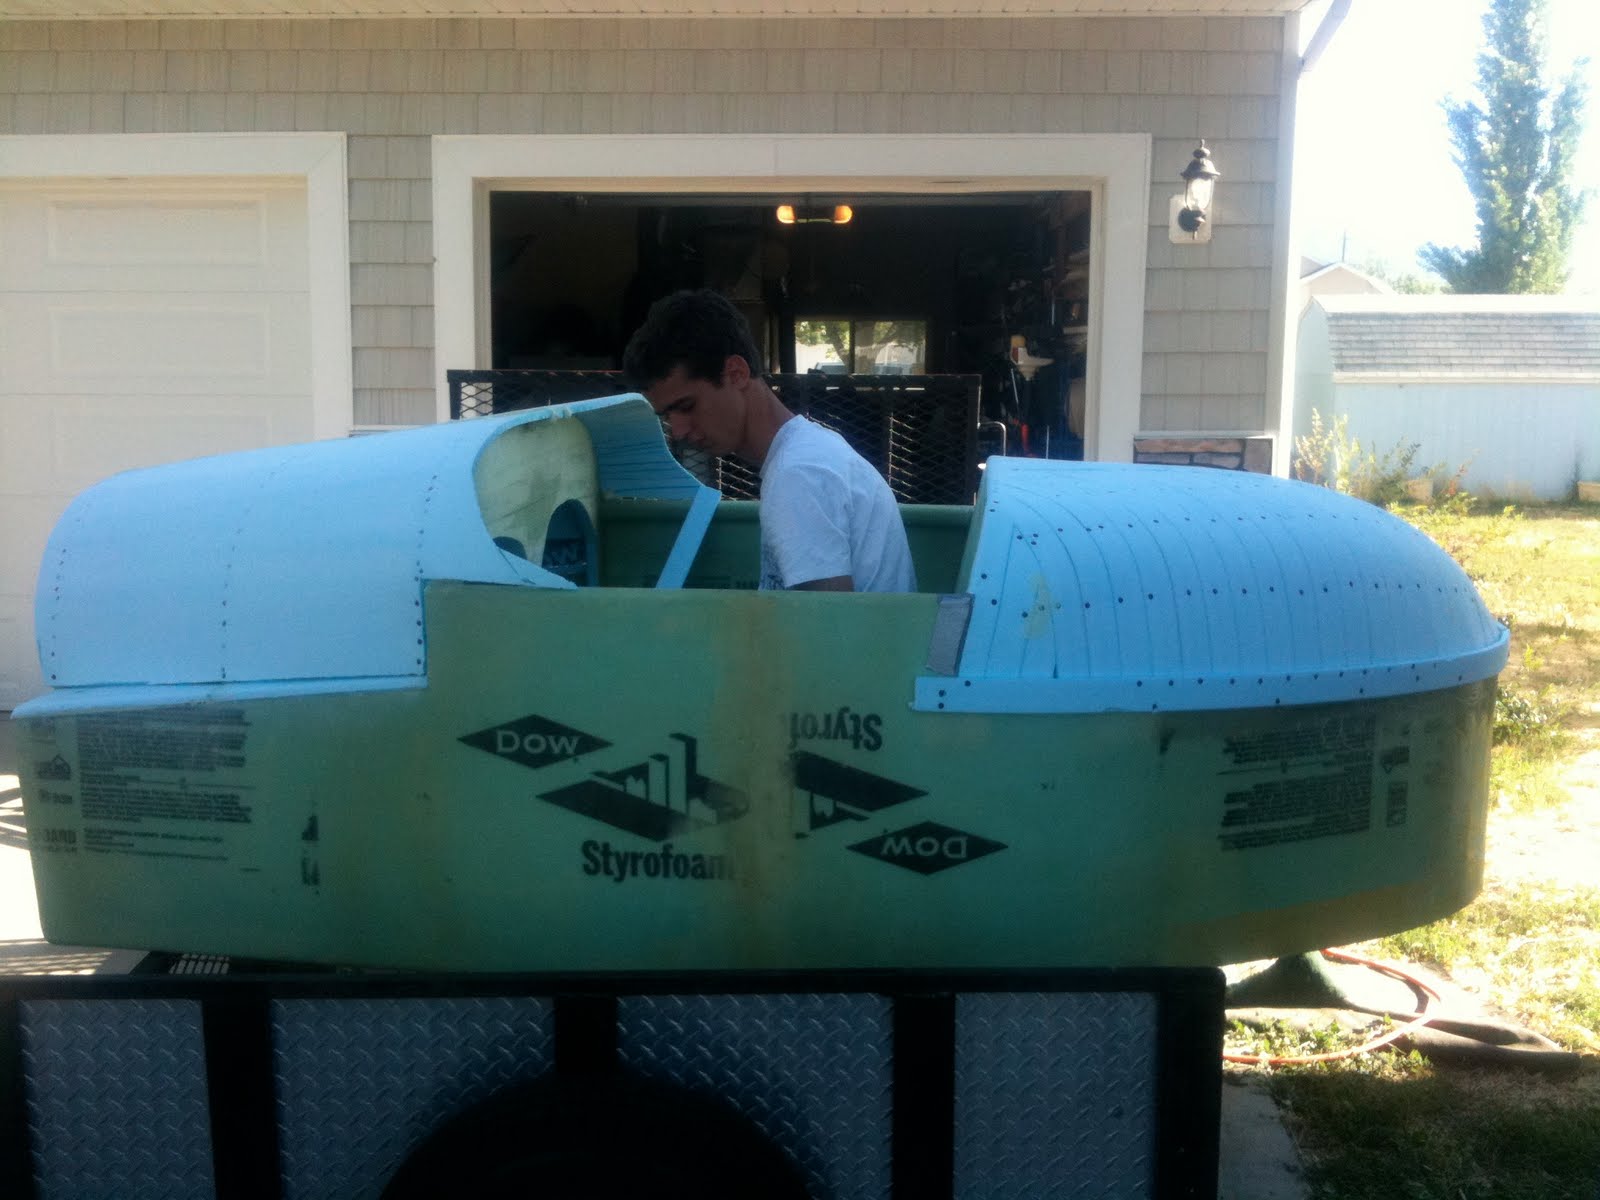 Left side of the body.
 We just completed the rear of the beatle back. This was difficult. I ended up doing it twice. We just got done sanding the rear and decided to take a few photo's.
 Thursday, August 26, 2010

The rear wheel well is mostly completed. I will be testing out access panel construction on the hood. Then I will make an access panel on the rear wheel well to change the rear tire. The same technique used on the hood will be used in the rear. I can still pick up the body by myself. It weighs around 80lbs now..

The plan is to fiberglass between the fasteners and then use a wooden frame to hold the shape and remove the fasteners. This will allow me to then fiberglass the inside to make it much simpler to attach then crawling in and trying to fiberglass under the hood. then we will be making access panels. Mike Arnold on his video shows how to make the panels. I am excited to try his method.

The beginnings of the hood. I still have a lot of sanding to go. But it is coming along.
Wednesday, August 4, 2010
 Here is the top deck of the rear wheel well. it turned out pretty good we need to fiberglass the inside of the wheel well next.
 So the main floor was used to make the sides and now it was time to cut out the floor to make the rear wheel well. This was the a bit messy but I did it outside and had the proper safety gear on (Mask, eye protection etc.).
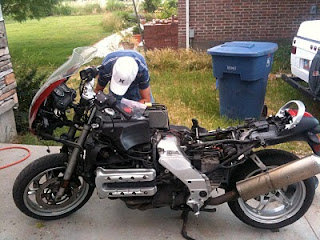
 Here is the 1200 cc motor! It is very large. I recently took off the alternator so I could remove the starter. The starter was just sitting there at a twisted angle it was not bolted to the intended mounts. Another reason to take the bike apart. Things that were amiss on the K1200 RS. I also hooked up a spring that was loose on the throttle return. Now I can figure out how to mount the engine to the frame.
Wednesday, July 7, 2010

Saturday, June 19, 2010
 |
| Roadstercycle http://www.roadstercycle.com/ reverse gear. 1300 + shipping. |

The reverse gear by Nova Racing.http://www.novaracing.co.uk . 1130 plus taxes and shipping. I will worry more about this when we get closer to having the frame done before we mount the K 1200 RS engine.

Drivers side impact support.
 Fiber-glassing the drivers side: on the inside. The outside is already done. See Picture below.
Wednesday, May 26, 2010


Wednesday, May 5, 2010
 Here it is. I just won this on e-bay. I am excited to have the engine on the way. This 1200cc engine produces 138 hp at 8,000 RPM. As this comes together I hope you will catch the vision of riding in comfort and having fun with an open cockpit. Stay tuned as the body is being finished and we start welding up the frame.
Wednesday, April 28, 2010
Rear Wheel drive:
 Here is the 08 Honda Goldwing rear swing arm I won on ebay. I've decided on rear wheel drive and will be using it on the beetle back replica. It came off a new goldwing to make a trike.

Subscribe to:
Posts (Atom)