Saturday, December 28, 2013

Carrier shaft

Wow it has been a while since I have made an updated post.  Life gets so busy.  So I have some great friends who helped me with the carrier shaft to go from the driveline to the swing arm (only .003 of runout).  I still need to make a frame to hold the carrier bearings.  I'll be working on that soon.  I now have the exact measurements to stretch the driveline form the transmission to the carrier shaft.

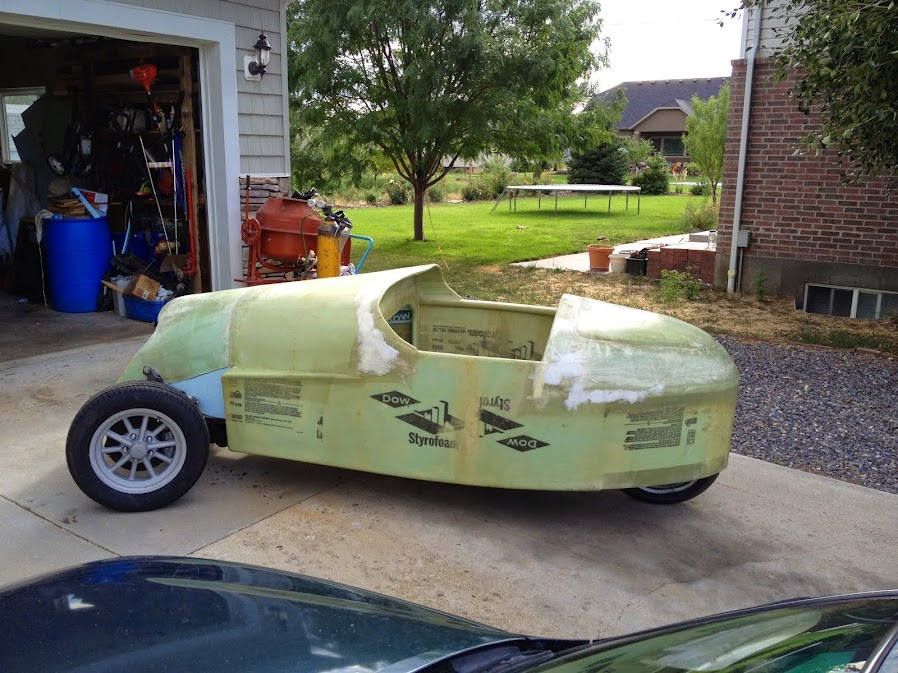
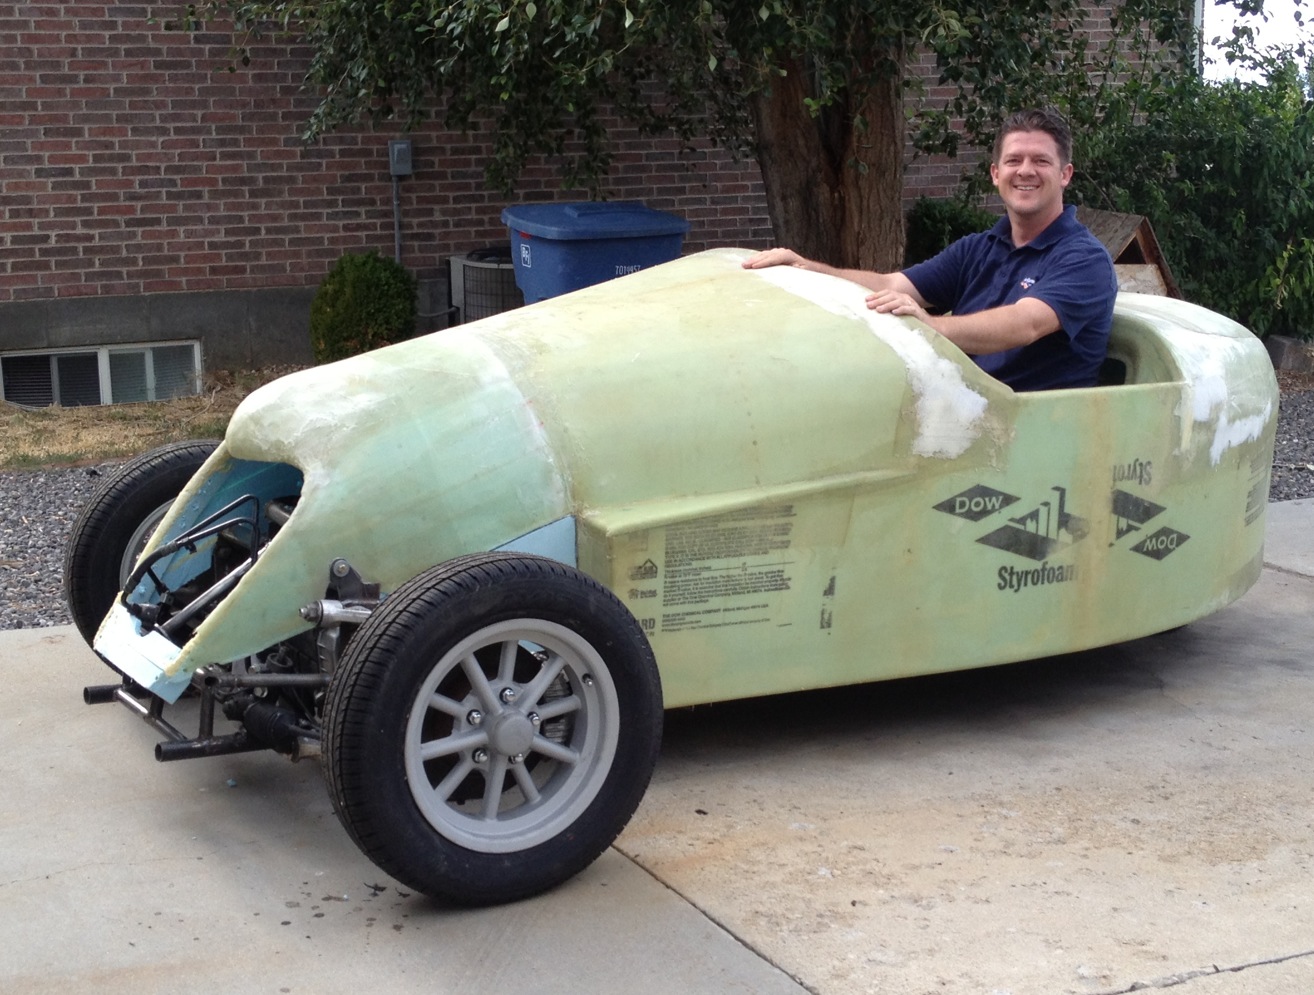
Body removed from the frame to work on the driveline.  

Saturday, October 5, 2013

Transmission with Reverse!

 Side view of the frame:  See the body in the background
 Frame shot from the front
Ok so the good news is that I got a K1200LT transmission:  This has reverse.   My Son and I pulled the engine and he helped me take off the K1200RS 6 speed transmission and we replaced it with the K1200LT transmission.  I will have reverse with out rigging up a starter motor onto the driveline like the JZR.  

Friday, September 6, 2013

Rolling Chassis! Rocket Launcher Wheels

Super fun cycle car.

Rocket Launcher Wheels look real good!

You can tell the front wheels need to be adjusted.  the drivers side wheel is toed out a bit.

Ok so I was really tempted to make some sounds to pretend I was driving the cycle car.
It has been two months since I posted last.  This is my birthday present some tires for the wheels and some lugs to mount the wheels.  Now I need to get the driveline done so I can start working on everything else.


Saturday, June 22, 2013

Output shaft for driveline:


 Output shaft without gears:  Now I have to design the driveline.  I will be making a housing for this shaft and several bearings.  This will attach to the rear swingarm.  The u-joint inside the rear swing arm.  I will probably machine off the splines on the inside of the shaft to ease in the assembly.

Output shaft with gears:
First taking the transmission apart:  I need the output shaft so I can make a new drive line to attach from the transmission to the rear swing arm.

Tuesday, June 4, 2013

Driveline:

I have wanted to get the driveline built for the trike:  And finally I found a reasonable option.  I found this transmission on ebay and will be able to use the output shaft to help build the driveline from the transmission to the rear swing arm.  I actually did do something in May and that was find the transmission and get it ordered.  Progress.  

Saturday, April 20, 2013

Body Work

Added skirt on hood

side view of Body

Going to build a drip trough for the trunk.  Fiberglass the back side.  Remove the foam in the middle and then fiberglass the front.  Then I can put a rubber seal around the trunk.  This will keep the trunk dry when it is raining.  You can also see the area with the ligher foam:  this is where the shock mount comes into the trunk.  Need to fiberglass this soon.

Wednesday, March 27, 2013

Engine Mount: upper A-arm support.

The engine mount/a-arm support:  5 bolts to remove the engine.  I am much more happy with this configuration.  

Saturday, March 9, 2013

Front Shocks Mounted

Overview of coil over:

I mounted the lower shock to the bottom of the a-arm.
Mounted the coil over shocks today.  I had to make some slight adjustment for the height of the shock but it turned out well.  I ran out of welding wire.  So I'll finish up the drivers side on Monday.

Saturday, March 2, 2013

First layup on the Nose of the Body

Spent a bit of time today doing some fine sanding and then doing the layup on the nose.  It was fun to get some time to work on the Trike.

Saturday, February 16, 2013

BMW Classics


I found a couple of my favorite BMW vehicles.  The BMW R50 motorcycle and 3/15 car.  

Re-purposed old electronics: Way better than an ipod docking station!

So my Son is way creative and wanted a very specific look for his I-pod docking station.  So we re-purposed an old Emerson color TV and old Sony boom box.  We still have the back of it to finish up but it works great.  The old button to turn the TV on is the volume and the old VHF/UHF button is now the on, am/fm/aux button.  So cool.  My wife helped with the project by sewing some cool material over some door screen material.  We then attached it to the tv frame.  The speakers are behind the magic curtain.   It sounds really great.  I love hanging with my family and doing fun stuff.  Thanks Son!

Monday, January 28, 2013

Rough Shape:

Rough Shape cut into the nose.  Now I will shape and sand and then do the first layer of fiberglass.

Tuesday, January 22, 2013

The Pine Wood Derby

After Race.  Super fun.  The Blue Whale was best of show.

Monday, January 21, 2013

Nose Job

 Just starting the nose of the Trike.  You gotta love foam.
 This is a shot after adding some more foam.  This will fill in the gaps.  Next step to shape the foam.
 The side profile I was hoping to accomplish.

The pine wood derby car.  My son loves fish and really wanted a whale so he sketched it and I cut it out and fiberglassed the shape.  He will do the paint job.  I'll post another picture of it after painting is complete.  Just Whaling around.

Tuesday, January 1, 2013

Front Nose

 It has been a long time coming:  Here is the beginings of what will be the front of the body.
The strips will be placed to create the front hood of the cycle car.